

The standard construct
By default we append the following to the C-terminus of your binder, connected by flexible GGGS linkers:Your binder
your design
GGGS
split-GFP11
expression
GGGS
Twin-Strep-tag
purify + immobilize
GGGSGGGSRDHMVLHEYVNAAGITGGGSGGGSGGSAWSHPQFEKGGGSGGGSGGSAWSHPQFEK
split-GFP11Twin-Strep-tag (two Strep-tag II copies)unhighlighted = GGGS linkers
Why these tags
- Twin-Strep-tag: a high-affinity, well-behaved handle for Strep-Tactin XT. We use it both to purify the binder and to immobilize it on the BLI or SPR sensor, so a single tag covers the whole workflow.
- split-GFP11: a small fragment that reconstitutes fluorescence with a complementary GFP1-10 fragment, letting us quantify expression without a separate readout. See Split-GFP quantification for the method.
Tag placement
C-terminal is the default. In our hands it gives the most consistent expression across protein types. You can request N-terminal placement instead if the C-terminus is functionally important for your design; just flag it at submission. The construct is designed so the tag sits away from the binding interface regardless of scaffold. The predicted structures below show the tag position relative to the paratope across representative protein types. In each: binder green, target blue, and the C-terminal tag gold, extending away from the binding site.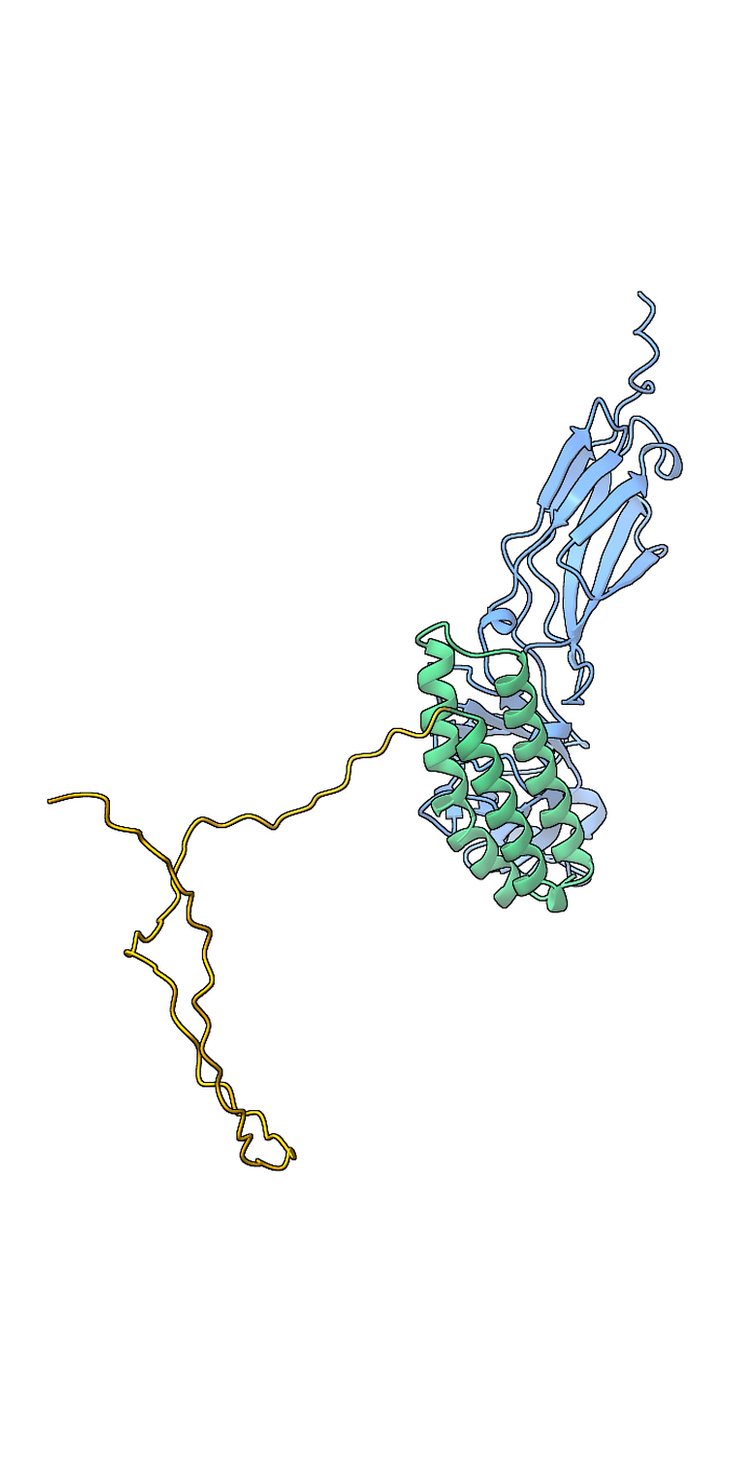
Denovo vs IL-7Ra.
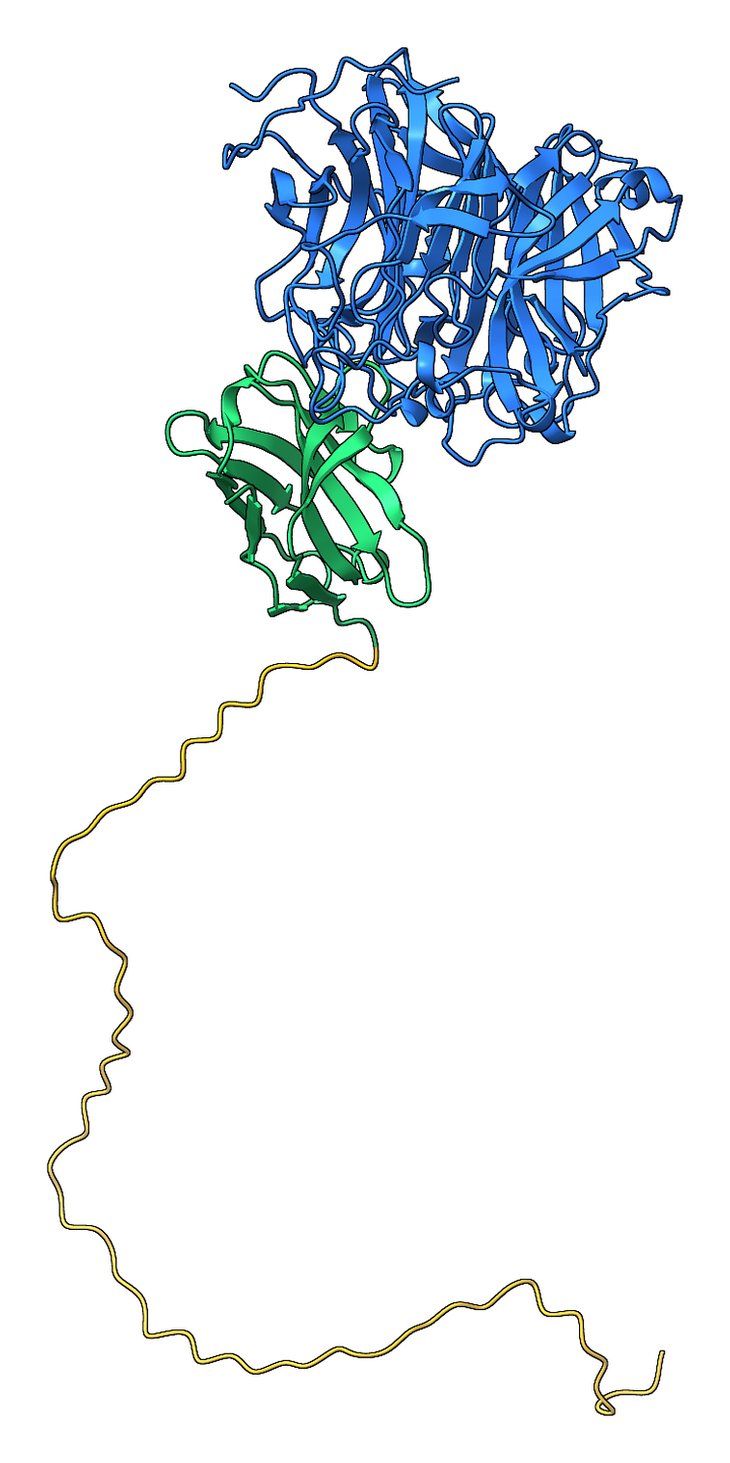
VHH vs Nipah-G head.
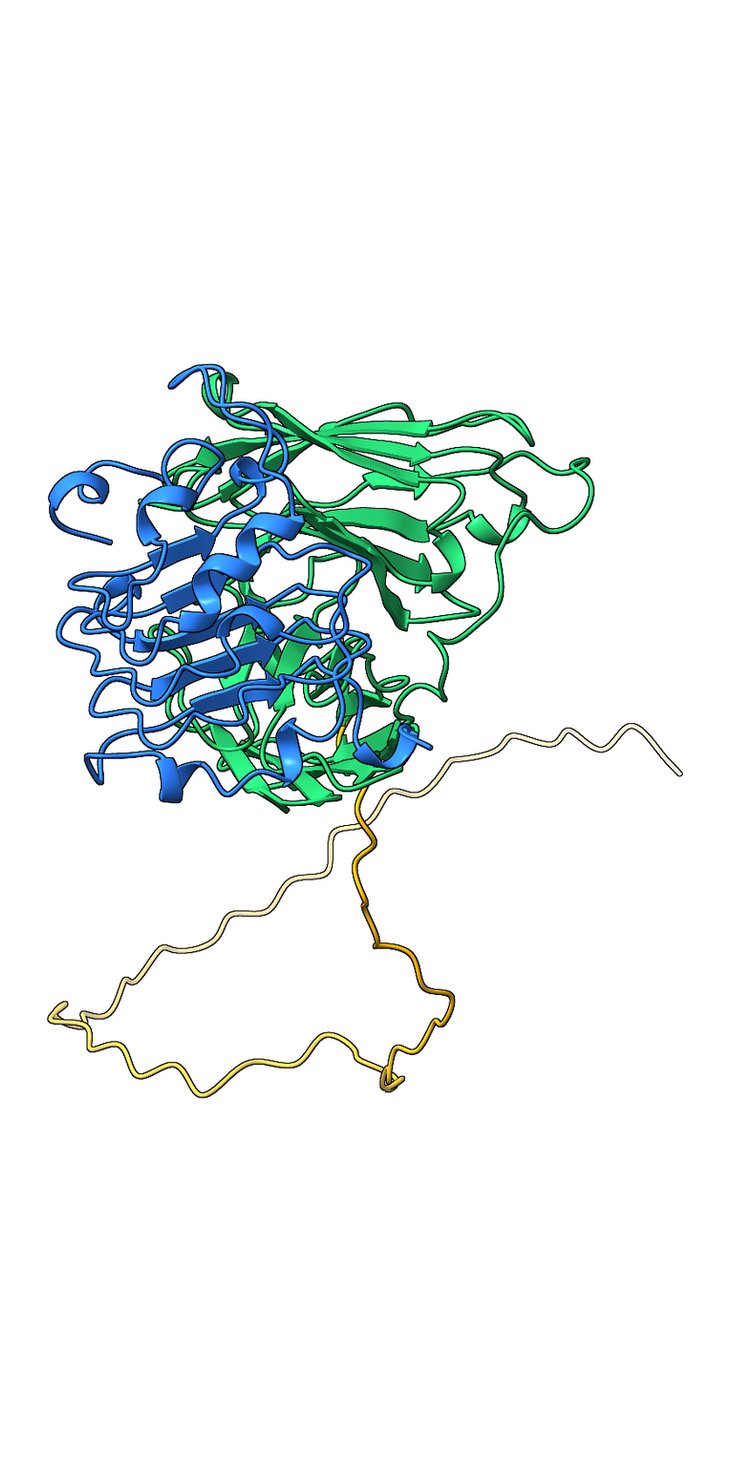
scFv vs EGFR.
How the tag is used in the assay
We measure binding kinetics by BLI on the Gator Bio Pro or SPR on the Carterra LSA XT. On both, the Twin-Strep-tag is the capture handle: it immobilizes your binder as the ligand on a Strep-Tactin surface (a biosensor tip for BLI, or the sensor chip for SPR), while the target is delivered in solution as the analyte.- Capture. Your Twin-Strep-tagged binder is captured onto the Strep-Tactin surface. This capture step also serves as the purification, so no separate purification is required on our platform.
- Kinetics. The target is presented in solution across a concentration series, and real-time association and dissociation yield kon, koff, and KD.
See also
- Split-GFP quantification: how we use the split-GFP11 fragment to quantify expression.
- Affinity Tag Purification: the purification handle in more detail.
- BLI and SPR: the binding assays this construct is built for.